Overlaying a mask on top of an image is a common step in visualizing results from computer vision models, especially in tasks like semantic segmentation, object detection, and medical image analysis. This helps developers and researchers easily see which parts of the image the model has identified as belonging to certain categories (like people, roads, tumors, etc.).
In this tutorial, we will learn how to overlay an RGB mask on an image using Python and OpenCV, blend it with transparency, and save the result — all using just a few lines of code.
Why Do We Need to Overlay Mask on Image?
Visualizing a model’s output is just as important as getting accurate predictions. A raw segmentation mask might only look like a bunch of colored regions, and without placing it on top of the original image, it can be hard to interpret.
Overlaying helps:
- Compare model predictions with ground truth
- Debug and inspect segmentation quality
- Create compelling visualizations for reports, presentations, or publications
Now, let’s dive into the actual implementation.
Code Implementation
Imports
import cv2
import numpy as np
- cv2 is the OpenCV library used for image reading, writing, and processing.
- numpy is used for numerical operations and type conversion, which is important for blending.
overlay_mask_on_image Function
def overlay_mask_on_image(image, mask, alpha=0.5):
    # Ensure both are the same size
    if image.shape[:2] != mask.shape[:2]:
        raise ValueError("Image and mask must be the same size")

    # Convert to float32 for accurate blending
    image = image.astype(np.float32)
    mask = mask.astype(np.float32)

    # Blend the mask and the image
    beta = 1 - alpha
    gamma = 0
    overlay = cv2.addWeighted(mask, alpha, image, beta, gamma)

    return overlay.astype(np.uint8)
- Ensures both image and mask are the same size (height and width).
- Converts both to float32 to allow decimal-based blending (OpenCV expects float for weighted addition).
- Uses cv2.addWeighted() to blend the original image with the mask:
result = alpha * mask + beta * image + gamma
Returns the overlaid result in the standard uint8 format for saving or displaying.


main Function
if __name__ == "__main__":
    # Load original image and RGB mask
    image = cv2.imread("images/00001.png", cv2.IMREAD_COLOR)
    mask = cv2.imread("masks/00001.png", cv2.IMREAD_COLOR)

    # Overlay the mask on the image
    overlayed = overlay_mask_on_image(image, mask, alpha=0.6)

    # Save
    cv2.imwrite("results/overlayed_result.png", overlayed )
- Loads the original image and the RGB segmentation mask.
- Calls the overlay_mask_on_image() function with alpha = 0.6 to blend.
- Saves the overlaid image to a results folder.
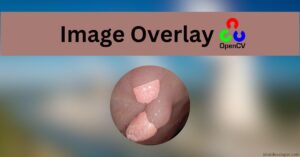
Output
After running the code, a new file will be created at: results/overlayed_result.png

This image will show the original input image with the mask overlaid in a semi-transparent manner. You can control how much of the mask is visible by tweaking the alpha value.
Conclusion
Overlaying a segmentation mask on an image is a simple but powerful technique to visualize and validate the results of image segmentation models. Using OpenCV’s addWeighted() function, you can create clear, visually compelling results in just a few lines of Python code.
Bonus Tips
- Try different alpha values (e.g., 0.3, 0.8) to adjust visibility.
- Use color-coded masks for multi-class segmentation tasks.
- Apply this to frames in a video to visualize real-time segmentation.