In this tutorial, we will learn to resize an image using OpenCV in the Python programming language. For this, we are using the cv2.resize() function. OpenCV refers to Open Source Computer Vision library aimed at computer vision and machine learning.
Image resizing refers to the process of changing the dimensions of the image. These dimensions can be either height, width or even both. It is generally done by adjusting the pixel value of the image by using various methods.
To use OpenCV in Python install the following libraries:
- NumPy
- OpenCV
To install the above given libraries, use the following command.
pip3 install opencv-python
pip3 install numpySyntax – cv2.resize()
The syntax of the cv2.resize() function is
cv2.resize(src, size, fx, fy, interpolation)- src: (required) The path of the input image.
- size: (required) The required size for the output image is given as a tuple of width and height
- fx: (optional) The scaling factor for the horizontal axis.
- fy: (optional) The scaling factor for the vertical axis.
- interpolation: (optional) It refers to the algorithm used for scaling or resizing. The following interpolation algorithms are available:
- INTER_NEAREST
- INTER_LINEAR
- INTER_AREA
- INTER_CUBIC
- INTER_LANCZOS4
Resizing an image
An image can be resized in the following ways.
- Resizing to specific width and height.
- Preserving the aspect ratio – the ratio of the height and the width of the input image.
- Downscale – decreasing the resolution of the image.
- Upscale – increasing the resolution of the image.
- Do not preserve the aspect ratio:
- Changing the height and keeping the width the same.
- Changing the width and keeping the height the same.
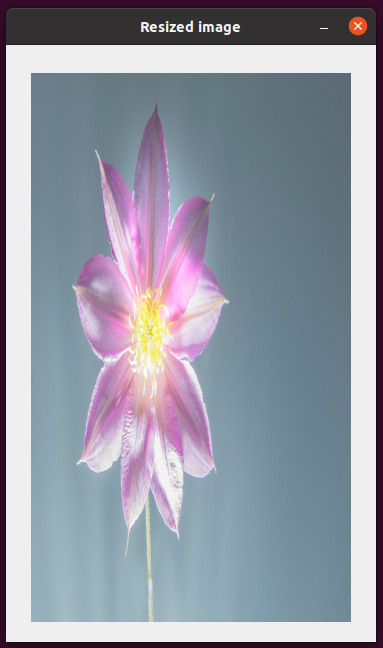
Source Image
The following image would be used as the input image for various resizing operations.
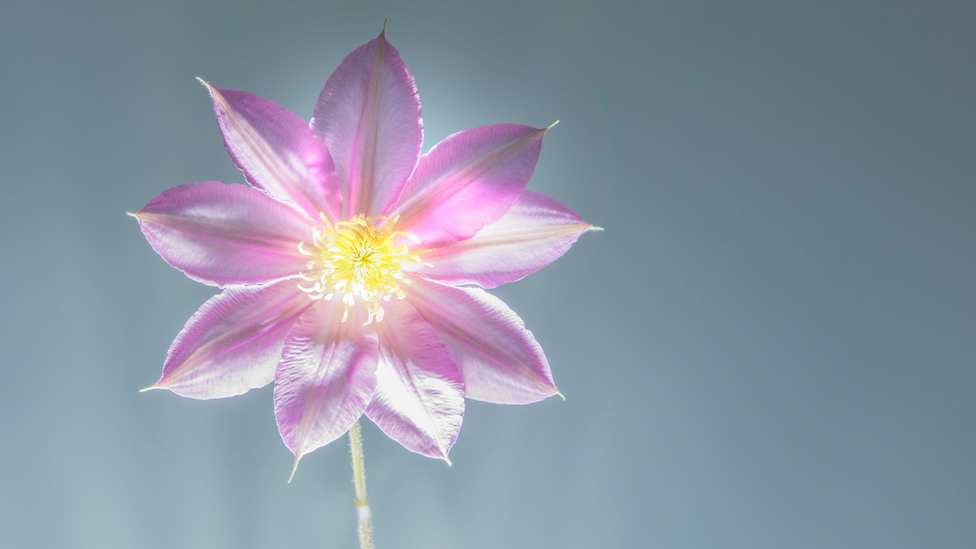
The resolution of the above given image are:
- Height: 549 pixles
- Width: 976 pixels
- Channels: 3
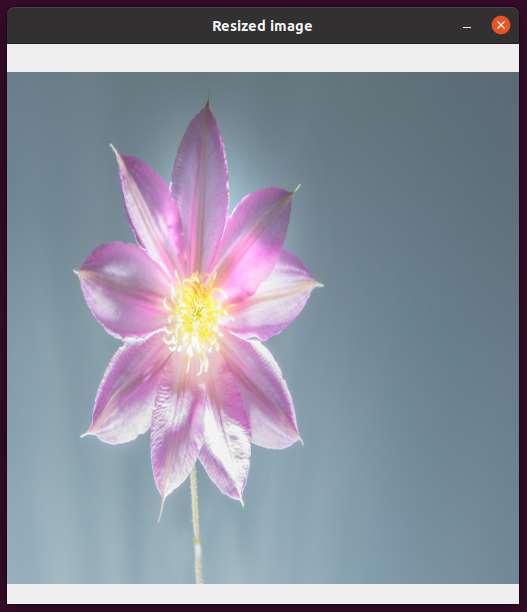
Resizing to specific width and height
import cv2

## Reading an image
image = cv2.imread("flower.png", cv2.IMREAD_UNCHANGED)
print("Original shape: ", image.shape)

## New width and height to resize the image
width = 512
height = 512

## Resizing the image
resized_image = cv2.resize(image, (width, height), interpolation=cv2.INTER_AREA)
print("Resized shape: ", resized_image.shape)

## Displaying the image
cv2.imshow("Resized image", resized_image)
cv2.waitKey(0)
cv2.destroyAllWindows()
Output
Original shape:  (549, 976, 4)
Resized shape:  (512, 512, 4)
Preserving the aspect ratio
Now, we will resize the image while maintaining the aspect ratio of the input image. Here, we are going to downscale and upscale the input image.
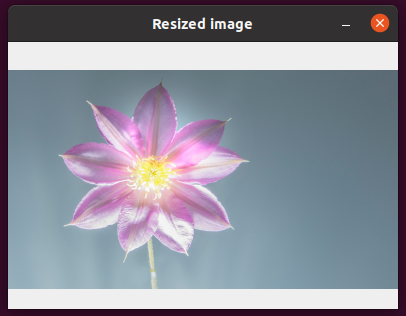
Downscale with cv2.resize()
With the downscale operation, we will decrease the resolution of the input image.
In the following example, the variable scale holds the value in percentage by which the image has to be scaled. A value less than 100 would downscale the image. Next, we calculate the new width and height by using the provided scale value.
import cv2

## Reading an image
image = cv2.imread("flower.png", cv2.IMREAD_UNCHANGED)
print("Original shape: ", image.shape)

## New width and height to resize the image
scale = 40
width = int(image.shape[1] * scale/100)
height = int(image.shape[0] * scale/100)

## Resizing the image
resized_image = cv2.resize(image, (width, height), interpolation=cv2.INTER_AREA)
print("Resized shape: ", resized_image.shape)

## Displaying the image
cv2.imshow("Resized image", resized_image)
cv2.waitKey(0)
cv2.destroyAllWindows()
Output
Original shape:  (549, 976, 4)
Resized shape:  (219, 390, 4)
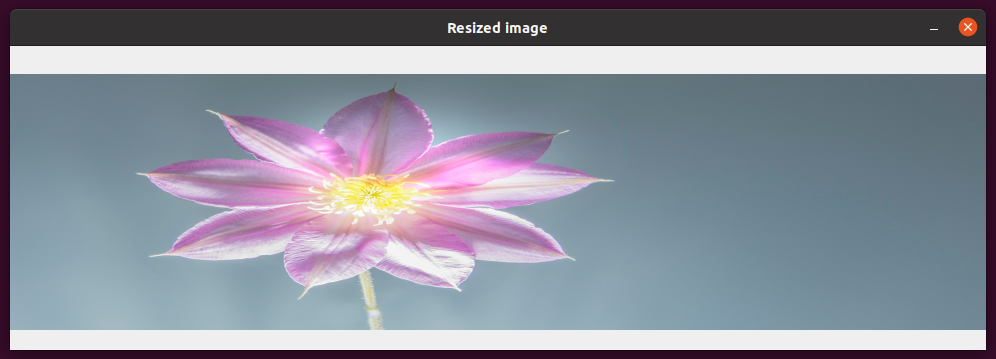
Upscale with cv2.resize()
With the upscale operation, we will increase the resolution of the input image. In the following example, we will upscale the input image by 150 percent.
import cv2

## Reading an image
image = cv2.imread("flower.png", cv2.IMREAD_UNCHANGED)
print("Original shape: ", image.shape)

## New width and height to resize the image
scale = 150
width = int(image.shape[1] * scale/100)
height = int(image.shape[0] * scale/100)

## Resizing the image
resized_image = cv2.resize(image, (width, height), interpolation=cv2.INTER_AREA)
print("Resized shape: ", resized_image.shape)

## Displaying the image
cv2.imshow("Resized image", resized_image)
cv2.waitKey(0)
cv2.destroyAllWindows()
Output
Original shape:  (549, 976, 4)
Resized shape:  (823, 1464, 4)

Do not preserve the aspect ratio
Sometime, we does not care about the aspect ratio of the input image. We just want to either change the height or the width of the input image.
Resizing the height with cv2.resize()
In the following example, we are going to change the height of the input image only. The width is going to remain unchanged.
import cv2

## Reading an image
image = cv2.imread("flower.png", cv2.IMREAD_UNCHANGED)
print("Original shape: ", image.shape)

## Original width and new height to resize the image
width = image.shape[1]
height = 256

## Resizing the image
resized_image = cv2.resize(image, (width, height), interpolation=cv2.INTER_AREA)
print("Resized shape: ", resized_image.shape)

## Displaying the image
cv2.imshow("Resized image", resized_image)
cv2.waitKey(0)
cv2.destroyAllWindows()
Output
Original shape:  (549, 976, 4)
Resized shape:  (256, 976, 4)
Resizing the width with cv2.resize()
In the following example, we will change the width of input image and leave the height as it is.
import cv2

## Reading an image
image = cv2.imread("flower.png", cv2.IMREAD_UNCHANGED)
print("Original shape: ", image.shape)

## New width and original height to resize the image
width = 320
height = image.shape[0]

## Resizing the image
resized_image = cv2.resize(image, (width, height), interpolation=cv2.INTER_AREA)
print("Resized shape: ", resized_image.shape)

## Displaying the image
cv2.imshow("Resized image", resized_image)
cv2.waitKey(0)
cv2.destroyAllWindows()
Output
Original shape:  (549, 976, 4)
Resized shape:  (549, 320, 4)
Conclusion
In this OpenCV tutorial, we have learned how to resize an image by using the cv2.resize() function.


Truly good blog short article and also valuable.