Image masking is a powerful technique used in image processing to manipulate specific parts of an image while leaving other areas untouched. This is particularly useful in applications like object detection, image segmentation, and photo editing. In this tutorial, we’ll explore how to perform image masking using OpenCV addWeighted function. We’ll start with a brief overview of how addWeighted works, followed by a step-by-step guide to masking an image using this function.
What is OpenCV’s addWeighted Function?
The addWeighted function in OpenCV is primarily used to blend two images by applying a weighted sum. It’s widely used in various image processing tasks where smooth blending of two images is required, such as creating overlays, adjusting brightness, or mixing multiple images to achieve the desired effect.
Formula:
dst = α⋅src1 + β⋅src2 + γ
Where:
- dst is the output image.
- src1 is the first input image.
- src2 is the second input image.
- α is the weight of the first image.
- β is the weight of the second image.
- γ is a scalar added to each sum.
By manipulating the weights α β, you can control each image’s contribution to the final output.
Syntax of addWeighted
Here’s the syntax of the addWeighted function in OpenCV:
dst = cv2.addWeighted(src1, alpha, src2, beta, gamma)
Parameters:
- src1: The first input image.
- alpha: The weight of the first image (src1).
- src2: The second input image.
- beta: The weight of the second image (src2).
- gamma: A scalar added to each sum.
Return Value:
- dst: The output blended image.
Image Masking with OpenCV addWeighted – Program
Now that we’ve covered the basics, let’s move on to image masking. The idea here is to combine the original image with a mask so that certain parts of the image are highlighted or modified based on the mask.
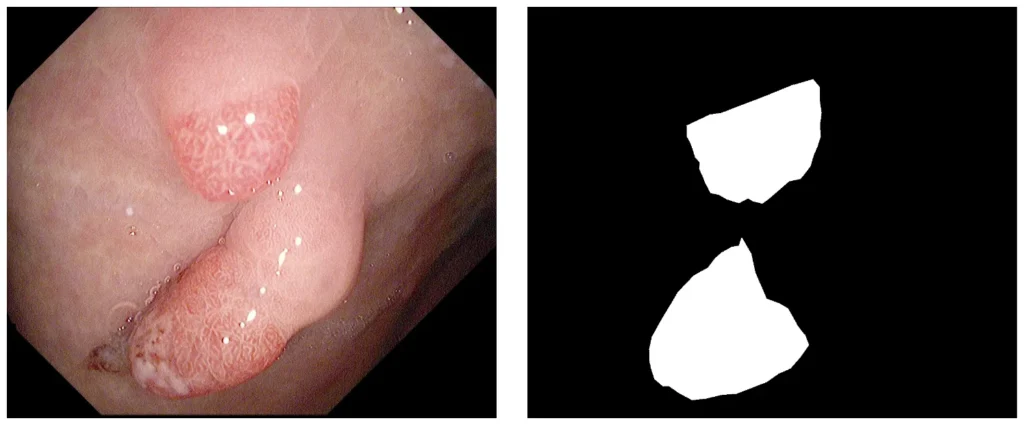
Step 1: Load the Image and Mask
First, we’ll load the original image and the mask. The mask should be a binary image in which the regions you want to highlight are white (255) and the rest are black (0).
import cv2
import numpy as np

image = cv2.imread('path_to_your_image.jpg')
mask = cv2.imread('path_to_your_mask.jpg', cv2.IMREAD_GRAYSCALE)
Step 2: Apply the Mask
Next, we’ll create a masked image by applying the mask to the original image. This is done by using the addWeighted function, which blends the original image with the mask.
mask = cv2.merge([mask, mask, mask])
masked_image = cv2.addWeighted(image, 0.7, mask, 0.3, 0)
In this example:
- 0.7 is the weight of the original image.
- 0.3 is the weight of the mask.
- 0 is the scalar added to each sum (you can adjust this to brighten or darken the image).
Step 3: Save the Result
cv2.imwrite("masked_image.jpg", masked_image)
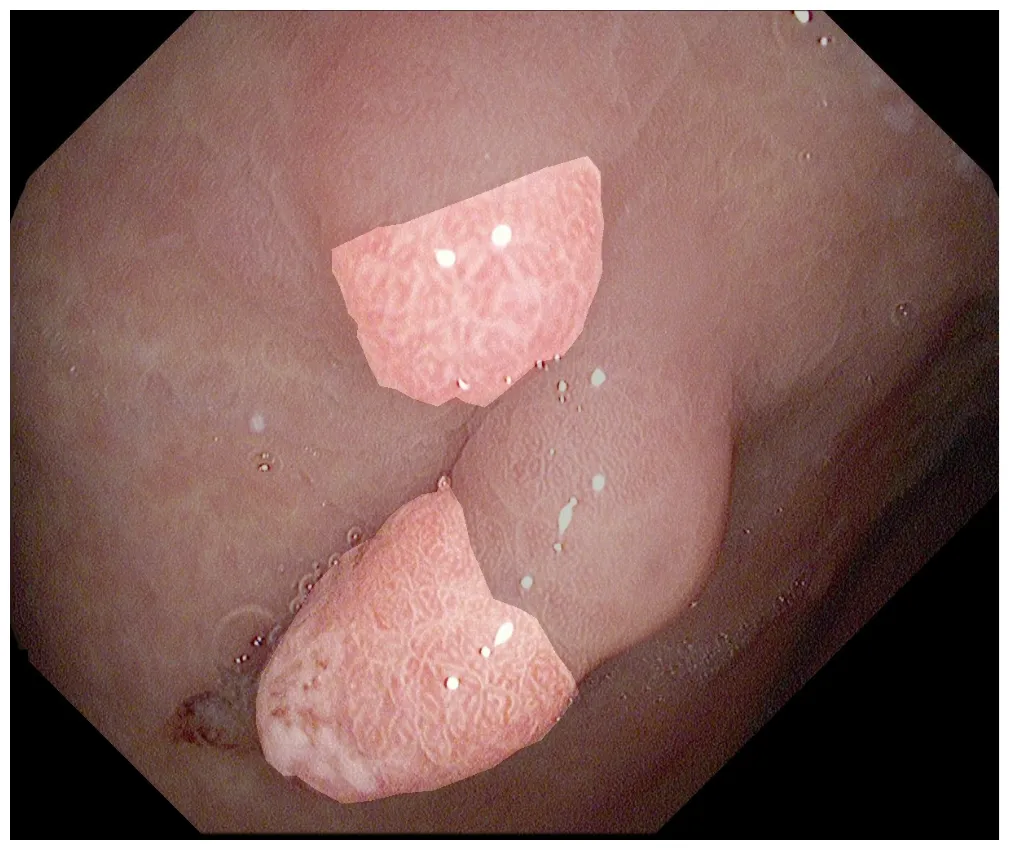
In the masked image, the result is a translucent type of mask. Now, let’s create a colorful mask.
Step 4: Create an RGB Mask
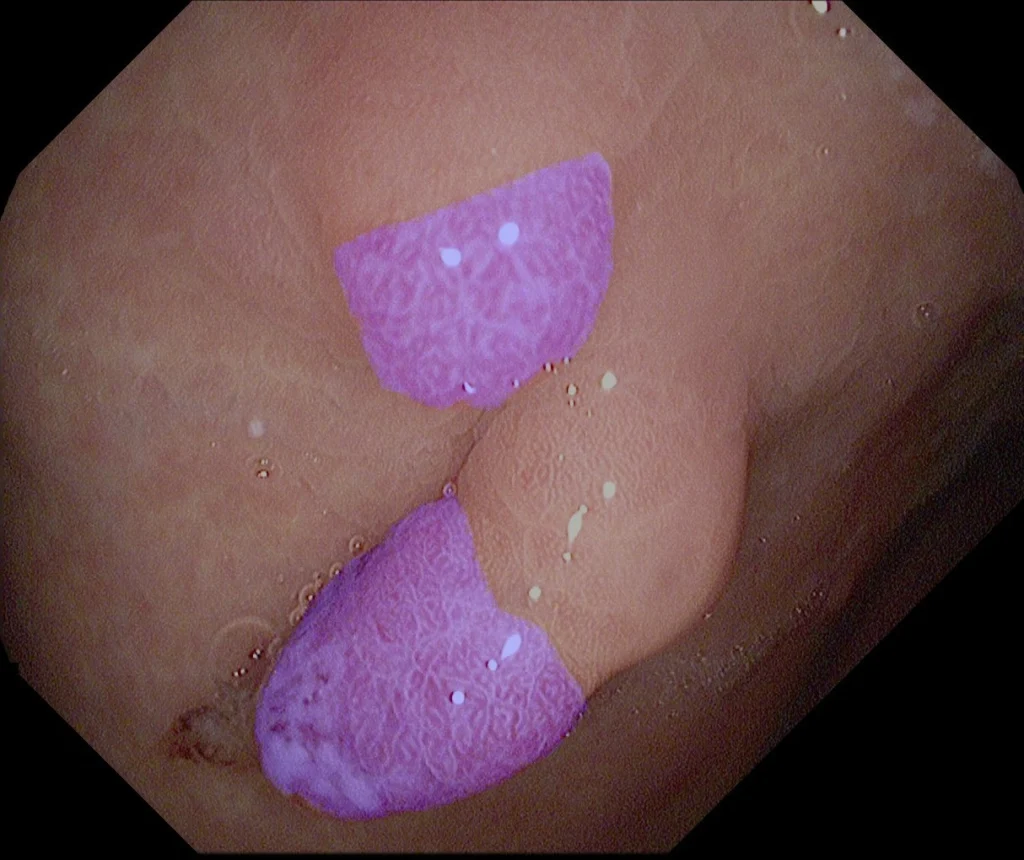
In this step, we’ll create a custom RGB mask. You can define which areas of the image should be colored differently based on the mask. For simplicity, let’s create a mask that highlights specific regions of the image with a chosen color.
rgb_color = [255, 0, 0]

rgb_mask = np.zeros_like(image)
rgb_mask[mask[:, :, 0] == 255] = rgb_color
Here:
- We create an empty RGB mask with the same dimensions as the original image using
np.zeros_like(image). - The BGR color
[255, 0, 0]represents blue, but you can choose any color by adjusting the values. - We then apply this color only to the regions where the grayscale mask is white (
mask == 255).
Step 5: Apply the RGB Mask Using addWeighted
Now, let’s blend this RGB mask with the original image using the addWeighted function to create the final output.
rgb_masked_image = cv2.addWeighted(image, 0.7, rgb_mask, 0.3, 0)
In this code:
0.7is the weight of the original image.0.3is the weight of the RGB mask.0is the scalar added to each sum.
This will result in an image where the selected regions (defined by the grayscale mask) are highlighted with blue, blending smoothly with the original image.
Step 6: Saving the Final Result
cv2.imwrite("rgb_masked_image.jpg", rgb_masked_image)
Conclusion
In this comprehensive guide, we’ve explored the powerful technique of image masking using OpenCV’s addWeighted function. We began by understanding the fundamentals of addWeighted and its role in blending images, and then we applied this knowledge to create a translucent masked image. This approach allowed us to selectively highlight parts of an image based on a grayscale mask.
We extended our tutorial by introducing an RGB mask, which enabled us to apply specific colors to image regions, creating visually striking effects. Combining the original image with a custom RGB mask demonstrated how to enhance or alter certain areas while maintaining a smooth blend.
Now that you understand the basics of image masking with addWeighted, you can experiment with different weights, masks, and images to create stunning effects and improve your image processing skills.