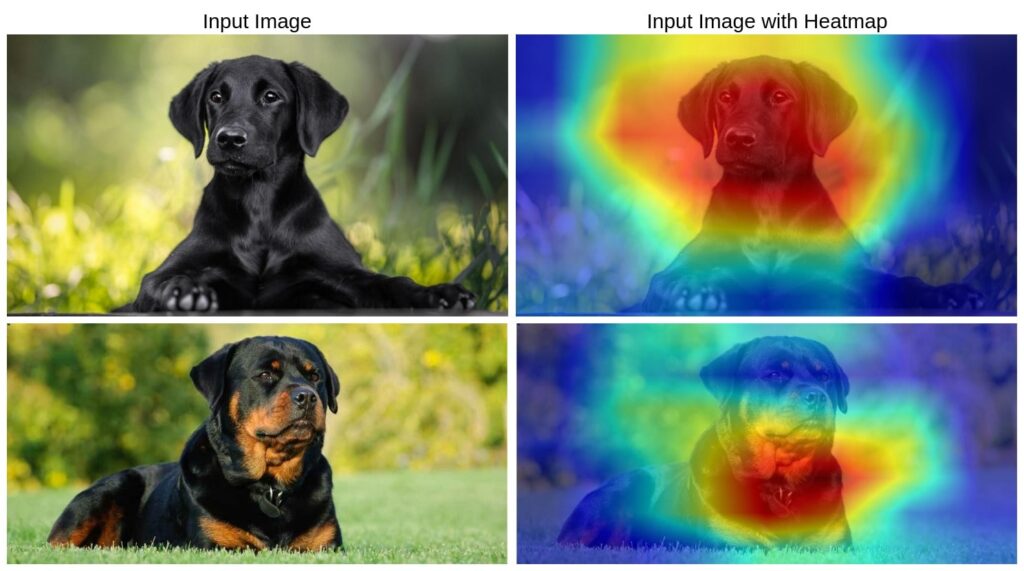
Deep learning models, particularly convolutional neural networks (CNNs), are widely used for image classification, object detection, and various computer vision tasks. However, these models are often referred to as “black boxes” due to their complex decision-making processes. To interpret these decisions and understand what parts of an image influence the model’s prediction, techniques like GradCAM (Gradient-weighted Class Activation Mapping) are used.
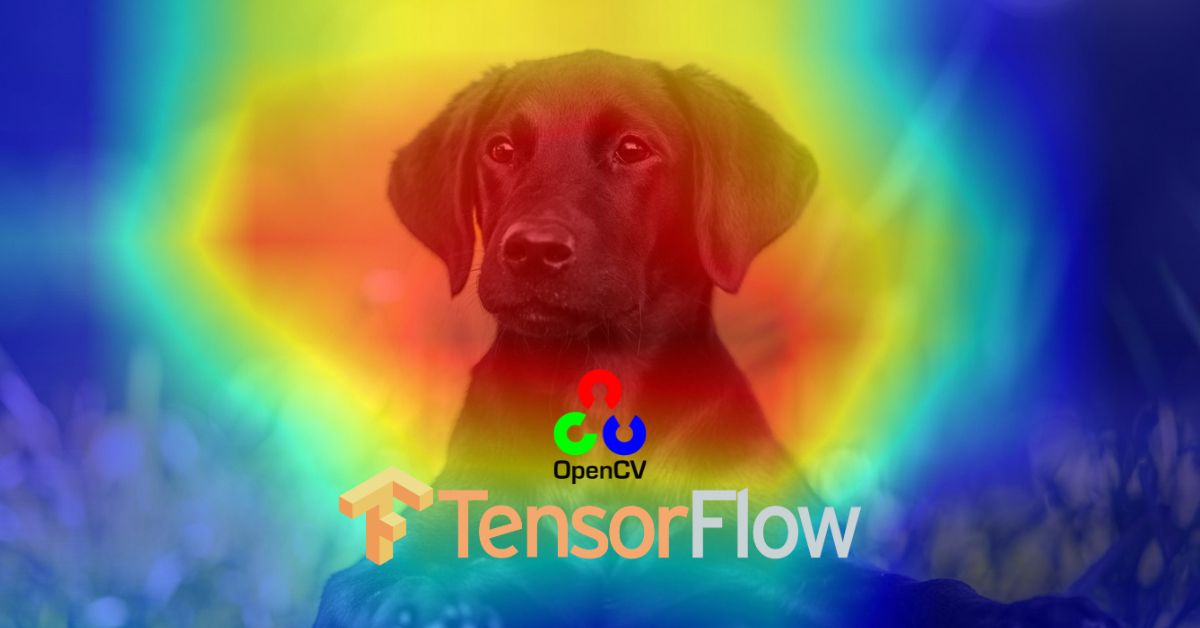
Grad-CAM generates a heatmap that highlights the regions in an image that contributed the most to a particular class prediction. This is essential for explainability, debugging AI models, and ensuring fairness in AI-based decision-making systems.
In this article, we will explore the implementation of Grad-CAM using TensorFlow and OpenCV. The provided code applies Grad-CAM to a MobileNetV2 model trained on the ImageNet dataset, demonstrating how to generate and overlay heatmaps on input images.
What is GradCAM?
Grad-CAM (Gradient-weighted Class Activation Mapping) is a technique used to improve the interpretability of deep learning models, particularly convolutional neural networks (CNNs). It helps visualize which regions of an image contribute the most to the model’s decision by producing a heatmap overlay on the original input image.
Research Paper: Grad-CAM: Visual Explanations from Deep Networks via Gradient-based Localization
The core idea behind Grad-CAM is to compute the gradient of the predicted class score concerning the feature maps of the last convolutional layer. These gradients are then used to weight the feature maps, highlighting important regions of the image. Unlike traditional Class Activation Mapping (CAM), which requires modifying the model’s architecture, Grad-CAM can be applied to any existing CNN without retraining.
Key benefits of Grad-CAM:
- Enhances model interpretability by visualizing decision-making areas.
- Useful for debugging and understanding model failures.
- Aids in improving trustworthiness in critical applications like healthcare and autonomous systems.
- Helps identify biases in AI models by analyzing class-specific activations.
GradCAM Implementation
In this article, we will explore a Python implementation of Grad-CAM using TensorFlow and OpenCV. The provided code applies Grad-CAM to a MobileNetV2 model trained on the ImageNet dataset, demonstrating how to generate and overlay heatmaps on input images.
Importing Libraries
import os
os.environ["TF_CPP_MIN_LOG_LEVEL"] = "2"
import tensorflow as tf
import numpy as np
import cv2
import matplotlib.pyplot as plt
Preprocessing the Input Image
def preprocess_image(img_path):
    img = cv2.imread(img_path, cv2.IMREAD_COLOR)
    img = cv2.resize(img, (224, 224))  # Resize for MobileNetV2
    img = np.expand_dims(img, axis=0)
    img = tf.keras.applications.mobilenet_v2.preprocess_input(img)
    return img
This function loads an image, resizes it to 224×224 pixels (which is the required input size for MobileNetV2), and applies MobileNetV2’s preprocessing function to normalize pixel values. The image is then expanded into a batch format before being returned.
Obtaining Class Labels
def get_class_label(preds):
    decoded_preds = tf.keras.applications.mobilenet_v2.decode_predictions(preds, top=1)[0]  # Get top prediction
    class_label = decoded_preds[0][1]  # Extract class name
    return class_label
This function decodes the model’s predictions and extracts the most probable class label using decode_predictions. This helps in understanding what the model has classified the image as.
Computing the GradCAM Heatmap
def compute_gradcam(model, img_array, class_index, conv_layer_name="Conv_1"):
    grad_model = tf.keras.models.Model(
        inputs=model.input,
        outputs=[model.get_layer(conv_layer_name).output, model.output]
    )

    with tf.GradientTape() as tape:
        conv_outputs, predictions = grad_model(img_array)
        loss = predictions[:, class_index]  # Loss for target class

    grads = tape.gradient(loss, conv_outputs)  # Compute gradients
    pooled_grads = tf.reduce_mean(grads, axis=(0, 1, 2))  # Global average pooling

    conv_outputs = conv_outputs.numpy()[0]
    pooled_grads = pooled_grads.numpy()

    # Multiply feature maps by importance weights
    for i in range(pooled_grads.shape[-1]):
        conv_outputs[:, :, i] *= pooled_grads[i]

    heatmap = np.mean(conv_outputs, axis=-1)  # Compute heatmap
    heatmap = np.maximum(heatmap, 0)  # ReLU activation
    heatmap /= np.max(heatmap)  # Normalize

    return heatmap
This function generates a Grad-CAM heatmap:
- Creates a modified model that outputs both feature maps from the last convolutional layer and the final predictions.
- Computes the gradient of the predicted class score concerning the feature maps.
- Applies global average pooling to compute the importance of each feature map.
- Weighs the feature maps accordingly and averages them to produce the heatmap.
- Normalizes the heatmap and applies a ReLU activation to remove negative values.
Overlaying the Heatmap on the Original Image
def overlay_heatmap(img_path, heatmap, alpha=0.4):
    img = cv2.imread(img_path, cv2.IMREAD_COLOR)
    heatmap = cv2.resize(heatmap, (img.shape[1], img.shape[0]))

    heatmap = np.uint8(255 * heatmap)  # Convert to 0-255 scale
    heatmap = cv2.applyColorMap(heatmap, cv2.COLORMAP_JET)  # Apply color map

    superimposed_img = cv2.addWeighted(img, alpha, heatmap, 1 - alpha, 0)  # Blend images
    return superimposed_img
This function overlays the Grad-CAM heatmap onto the original image:
- Resizes the heatmap to match the input image size.
- Converts the heatmap into an 8-bit color image and applies the JET colormap for better visualization.
- Uses OpenCV’s
addWeightedfunction to blend the original image and the heatmap, creating a superimposed effect.
Running the Full Pipeline
if __name__ == "__main__":
    model = tf.keras.applications.MobileNetV2(weights="imagenet")

    img_path = "images/dog-2.jpg"  # Replace with your image path
    img_array = preprocess_image(img_path)

    preds = model.predict(img_array)
    class_index = np.argmax(preds[0])  # Get class index
    class_label = get_class_label(preds)

    print(f"Predicted Class: {class_label} (Index: {class_index})")

    heatmap = compute_gradcam(model, img_array, class_index)
    output_img = overlay_heatmap(img_path, heatmap)

    cv2.imwrite("heatmap/2.jpg", output_img)
This script:
- Loads the pre-trained MobileNetV2 model.
- Preprocesses the input image.
- Obtains model predictions and class labels.
- Generates the Grad-CAM heatmap.
- Overlays the heatmap on the image and saves it.
Output:

Conclusion
Grad-CAM is a powerful tool for visualizing how deep-learning models make decisions. By implementing the above pipeline, one can analyze and interpret model predictions, making deep learning more transparent and explainable. This implementation is useful for AI practitioners working on explainability, debugging deep learning models, and improving model trustworthiness in critical applications such as healthcare and autonomous systems.


